Friday, February 22, 2019

5 Ways to Fix iPhone Stuck on Verifying Update When Updating to iOS 12 2019


5 Ways to Fix iPhone Stuck on Verifying Update When Updating to iOS 12 2019
"Hello, I need help. Actually, I started installing the iOS 12 in the morning and my iPhone stuck on verifying update screen for 5 hours. What kind of problem is this? Will the new update installation taking some time or not? I want some solution for this. Please help!"


Many people prefer performing update process wirelessly i.e. without iTunes and they are likely to get verifying update screen for long time. However, the issue restricts smooth updating and is annoying but it can be repaired by some fixes. Here is what you can try when your iPhone stuck on Verifying Update screen.
5 Ways to Fix iPhone Stuck on Verifying Update When Updating to iOS 12


1. Hard Reset Your iPhone


2. Press Sleep/Wake Button


3. Restore iPhone with an Old Backup


4. Fix the Problem without Data Loss


5. Hardware Issue
1. Hard Reset Your iPhone

Well, your iPhone is stuck on Verifying Update and you can't even do anything as everything is stucked, try to perform a hard reset then as that may help restore the proper functioning of your device.

If you have:


iPhone 7 or iPhone 7 Plus, you are required to press and hold the volume down and power button simultaneously.


iPhone 6 or earlier, hold down Home button and power button simultaneously.

Hold the buttons for around 10 seconds until the Apple logo come up on the screen. Let go the buttons and check if your issue resolves. Most probably, it should get resolved as rebooting an iPhone can resolve up to 70% of the issues.


2. Press Sleep/Wake Button

If the hard reset doesn't make any change and you face that iPhone stuck on Verifying Update issue again, try this Sleep/Wake button trick. What you are required to do is just simply hit the Sleep/Wake button of your device for a few number times.

Note: Make sure, between each press you wait for a couple of seconds.

Getting a bit in detail, pressing the Sleep/Wake button again and again forces your iOS device to lock the screen then wake it up, then again lock it up and wake it up again. Repeating this over and over again for about 5-10 times in a row most probably resolves the issue of stucked verifying update.

If the trick works, you'll see an Apple logo and progress bar on the screen. Now let the device do its work to install the software update. Be patient, it may take some time install the update.
3. Restore iPhone with an Old Backup

If the above solutions didn't prove helpful then try restoring your iOS device with an older backup via iTunes. It is another quick fix you can try to get your issue resolved. Any faulty changes made to the device's settings that are causing the issue will be rolled back and your device should behave as normal.


Launch iTunes application on your Mac or Windows computer.


With the help of a lightning cord, connect your iOS device to the computer. If you are asked to enter your device's password or Trust the computer, allow it and follow the further steps.


As soon as your device gets connected, it will appear on iTunes. Tap on it when you see it.


Push "Restore Backup" button and select the most relevant one by monitoring the date and size of the earlier backups.


Lastly hit Restore and let the process complete.


4. Fix the Problem without Data Loss (iOS 12 Supported)

Does your iPhone still stuck on Verifying Update screen? If all the above solutions went in vain, don't worry; we have a one-stop solution that will positively help you. You will be out of the trouble when you use iMyFone iOS System Recovery. It's a third-party tool that provides efficient solution for iOS issue. This is why it has gained a great level of popularity.Sponsor ads:

Gihosoft Free iPhone Data Recovery:iphonerecovery.com

Free iPhone Data Recovery Software for Windows/Mac

Recover up to 12+ types of files, including contacts, SMS, photos, WhatsApp, Viber, notes, etc.

Restore lost data from iOS devices directly or from iTunes and iCloud backup

Recover iPhone data lost due to iOS upgrade/jailbreak, accidental deletion, device lost or broken

Support all the latest iPhone, iPad and iPod Touch

Both Free and Pro version.

If you lost data after you updated to a new iPhone, you can always use Gihosoft iPhone Data Recovery to get the data back from the old iPhone or backup.

Top 10 Best FRP Bypass Tools to Bypass Google Account on Android Device 2019

Worth reading:download youtube 1080p

If you use android phones, please choose Gihosoft Android Data Recovery

Jihosoft Android Data Recovery: the best Android Data Recovery software for Windows and Mac to recover deleted contacts, messages, photos, videos, WhatsApp and etc from Android

Wednesday, February 20, 2019

How to Perform iOS 12 Downgrade 2019?


Part 1: How to Downgrade iOS 12 to iOS 11.3
1 Why Should We Downgrade from iOS 12 to 11.3?

ioS 11.3 is enjoyed by millions of people. Apart from bug fixes ,iOS 11.3 contains a number of features like New camera setting, a new effect for messages called celebrate for use in imessage , a new health app setting that allows to notify any emergency contact automatically when emergency SoS is used. The update offers many new and exciting features which are should definitely be given a shot!
2 Steps to Downgrade from iOS 12 to 11.3

Step 1: Connect your device to your computer and then launch iTunes.

If it compels you to download a newer firmware, tap "cancel".

Step 2: Tap "Restore iPhone" on the summary page.

Step 3: Pressing the Option key (Mac) or shift key (Windows), and click Restore. Then go to the location where you have saved the iOS 11.3 IPSW file.

Step 4: Click "Restore" and process will be finished.


Part 2: How to Downgrade from iOS 11.3 to 11.2.1
1Why Should We Downgrade from iOS 11.3 to 11.2.1?

iOS 11.2.1 offers crucial changes like security content page for 13 significant vulnerabilities of iOS 11.2. It can cause a huge impact on the performance of your device as well. It has APNs server,such as an attacker in a privileged network position can track a user’s activity.
2Steps to Downgrade from iOS 11.3 to 11.2.1

Step 1: Download iOS 11.2.1 IPSW file.

Step 2: Put the device in DFU mode and connect it to iTunes.

Control the "Power" and "Home" at the same time. After Apple logo shows, release "Power" and hold "Home" till you see "Connect to iTunes".

Step 3: Tap "OK". Hold the key “Option” for Mac or “Shift” on Windows and then choose “Restore iPhone”.

Step 4: Choose iOS 11.2.1 IPSW file.

Step 5: Click “Restore and Update”.


Part 3:How to Downgrade from iOS 11.3 Beta to iOS 11.2.1
1Why Should We Downgrade from iOS 11.3 Beta to 11.2.1?

iOS 11.2.1 has some really amazing tricks. Such as freeing some of the memory in your iPhone or clear the caches. It also has a Jail breaking update which is also advantageous in many aspects.
2Steps to Downgrade from iOS 11.3 Beta to 11.2.1

Step 1: Plug your device into your computer.

Step 2: Turn off your device.

Step 3: Hold the Power button for 3 seconds.

Step 4: Holding the Home button without releasing the Power button for 10 seconds.

Step 5: Release the power button and hold the home button until you get notified from iTunes that it has detected your device is in Recovery mode.

Step 6: Click “OK”. Choose the iOS 11.2.1 IPSW file that you downloaded earlier.

Step 7: Tap "Restore and Update".


Part 4:Things you Should Know Before Downgrade

(1). Backup Using iCloud

In order to secure your information. You should backup your iPod,iPad and iPhone if ever it gets lost, replaced or damaged in any case. iCloud is an amazing way of backing up your device and keeping the data safe and secure.Sponsor ads:Schedule Text Messages on iPhoneMust Read:If you lost data after you updated to a new iPhone, you can always use Gihosoft iPhone Data Recovery to get the data back from the old iPhone or backup.

Gihosoft Free iPhone Data Recovery:iphonerecovery.com

If you use android phones, please choose Gihosoft Android Data Recovery

1. Connect your device to a WI-FI network.

2. Go to setting, your name and tap iCloud.

3. Tap iCloud backup.

4. Make sure the backup finished.

(2). Free Up Enough Space Sponsor ads:

Jihosoft iPhone Data Recovery:https://www.jihosoft.com/recovery/ios-data-recovery.html

Jihosoft iPhone Data Recovery

Free iPhone Data Recovery Software for Windows/Mac

Recover up to 12+ types of files, including contacts, SMS, photos, WhatsApp, Viber, notes, etc.

Restore lost data from iOS devices directly or from iTunes and iCloud backup

Recover iPhone data lost due to iOS upgrade/jailbreak, accidental deletion, device lost or broken

Support all the latest iPhone, iPad and iPod Touch.

Tips:

How to transfer messages from iPhone to iPhone

Gihosoft Free iPhone Data Recovery:https://www.gihosoft.com/iphone-data-recovery-free.html

Gihosoft iPhone Data Recovery Free

Sunday, August 19, 2018

How to Turn Off Lock Screen On iPhone with Password


How to Turn Off Lock Screen On iPhone with Password

If you want to turn off lock screen on iPhone, this simply implies turning off the passcode with the aim of getting the lock screen to disappear whenever your password is disabled.

Step 1: Go to Settings on iPhone and select Touch ID & Passcode.

Step 2: Type your screen lock password. Scroll down to locate the "Turn Passcode Off" option. Select it.

Step 3: A pop-up box will appear, asking you to confirm the process of turning off your password. Simply click on "Turn Off" to turn off the iPhone screen.

Step 4: For you to be able to disable the password, your initial password is required. Simply input the original password.


Immediately the password has been disabled, you will not be required to enter it.
Use Recovery Mode to Turn Off Lock If You Can’t Sync with iTunes

This method is available for any situations.

Step 1: Connect your iPhone to computer and launch iTunes.

Step 2: Bring your iPhone to recover mode:


For iPhone X/8/8 Plus: Press and quickly release the Volume Up botton > press and quickly release the Volume Down button > press the Wake/Sleep button until you see the “connect to iTunes” screen.


For iPhone 7/7 Plus: Hold the Wake/Sleep and Volume Down buttons at the same time until you see the “connect to iTunes” screen.


For iPhone 6s and earlier: Hold the Home and Wake/Sleep buttons at the same time until you see the “connect to iTunes” screen.


Step 3: When you see the pop-up on iTunes, click on “Restore”. It will download the software to your iPhone. If it takes more than 15 minutes, your device will exit recovery mode. You need to repeat Step 2 and Step 3.

After removing the screen lock from iPhone, set up your iPhone by restoring the backup from iTunes.
My iPhone is Frozen on Lock Screen? The Fixes!

If you have an iPhone screen that is locked up or frozen. The ideal step is to simply remove a battery from a particular device when it locks up but Apple devices don't have removable battery hence, you need to try these options:
1 Try to Power Off

Try to turn off the iPhone and turn the iPhone on again within few minutes. You need to hold the Sleep/Wake button for few seconds until you notice the appearance of a red slider. Slide the slider to power off the device.
2 Force Reset

You can force a reset if all the available options refuse to work. Forcing a reset will not delete any data from the device, but may fix your issues.


On iPhone X/8/8 Plus: Press and quickly release the Volume Up botton > press and quickly release the Volume Down button > press the Wake/Sleep button until you see the Apple icon.


On iPhone 7/7 Plus: Hold the Wake/Sleep and Volume Down buttons at the same time until you see the Apple icon.


On iPhone 6s and Earlier: Hold the Home and Wake/Sleep buttons at the same time until you see the Apple icon.

If you can’t sync with iTunes and want to rescue data from a disable iPhone, you could try Gihosoft iPhone Data Recovery. Also feel free to ask questions on the iDevice is disabled error in the comments section below.

You may also like:


How to Rescue iPhone Photos and Videos When Stuck in Recovery Mode

How to Get iMessage on Windows PC

4 Easy Ways to Transfer Photos from iPhone to Computer

Sponsor Ads:
Jihosoft Android Data Recovery: the best Android Data Recovery software for Windows and Mac to recover deleted contacts, messages, photos, videos, WhatsApp and etc from Android devices.

Transfer Contacts from iPhone to Computer Without iTunes


Transfer Contacts from iPhone to Computer Without iTunes

Tip 1: Export iPhone Contacts to Computer via Email

Another way to get your contacts from your iPhone to your computer is to share the contact card via Email, by essentially emailing the contact card to yourself. Here’s a step-by-step guide.
Step 1: Open the Phone app on your iPhone and find the contact you would like to transfer to the computer.
Step 2: Scroll down to the bottom and select “Share Contact.”
Step 3: Tap on the Mail icon and email the contact to yourself.
Step 4: Now open your mail provider on the computer and download the attachment to save to your computer.

Tip 2: Transfer All Contacts from iPhone to Computer via iCloud

You can also easily transfer contacts from iCloud to your computer. Follow these simple steps to do that;
Step 1: On your iPhone tap on Settings > iCloud to open the iCloud settings.
Step 2: Enable contacts and a popup will appear asking you to Merge the contacts in iCloud. Tap “Merge” to continue.
Step 3: Now go to the official site of icloud (icloud.com) on your computer and login to your account.
Step 4: Click “Contacts” to access your contacts. Then click on the settings (cog) icon at the lower-left end of the screen and click “Select All”.
Step 5: Click “Export vCard” and all the selected contacts will be exported to your computer.


You may also like:

Gihosoft Total Video Converter is a professional all-in-one video tool that enables you to convert videos and audios into various different formats. You can also download videos from YouTube or other online video sharing sites and convert them easily. Plus, you’re able to personalize your videos with its inbuilt editor, such as, trimming, cropping, applying video effects, adding watermark, subtitles, and more. If you need a powerful and professional desktop video converter program, just download Total Video Converter and follow the step-by-step guide here to have a try.

Gihosoft Free Android Data Recovery can help you easily recover lost data such as photos, videos, contacts, text messages, WhatsApp & Viber chats from Google Pixel/XL or other Android phones effortlessly.

Monday, August 13, 2018

How to Fix The iPhone cannot be restored.


1. Use Original USB Cable

If you encounter the problem 'The iPhone cannot be restored. The device cannot be found', it is highly recommended to use the original Apple lightening cable which was supplied with your device than any other USB cable. Just in case, if you are using the original one only and are still not able to connect your iPhone with the PC, you must ensure that the USB cable is actually working out or not. Try plugging in another iPhone with the same cable. If the cable is faulty, you need to buy out an original Apple lightning cable to proceed.


2. Update iTunes to the Latest Version

Generally the issue of restoring, including the error message 'The iPhone cannot be restored. The device cannot be found', arises when the iTunes application is not updated to its latest version. To get this done, here's the step by step tutorial.


For Mac: Go to the App Store. Towards the top of the App Store window, select the 'Updates' option. You will be able to see if there is any iTunes update available or not.


For Windows: Launch the iTunes. Navigate the 'Help' menu and hit on 'Check for Updates' option.


If there are any updates available, ensure to follow the prompts to install the latest version.
3. Force Restart Your iPhone and Try Another Computer

If you are trying to restore your iPhone but the iTunes error states 'The iPhone cannot be restored. The device cannot be found'. You can still start afresh by forcing a restart over your device and then try again with restoring your phone.

For iPhone 6 or below:

If you have iPhone 6 or any lesser version, you can optimally force the restart in your phone by pressing the "Home" and "Sleep/Wake' buttons together till the apple logo does not surface on your screen.


iPhone 7 Series:

Thumb down the "Sleep/Wake" and "Volume Down" button altogether to obtain the Apple logo on the screen. If you successfully get that, you may free your fingers from the tabs and your iPhone would go on a restart mode.


iPhone 8, 8 Plus and X:

Push and release the "Volume Up" button. Repeat the same with the "Volume Down" button. Then, hold the 'Power' button down until the apple logo does not appear on the screen.


Connect your phone with different PC

You can even connect your phone from a different PC and check if you still get the error message 'The iPhone cannot be restored. The device cannot be found' on that PC.


If you lost videos from iOS Camerall Roll which are nowhere to download again, you can use Gihosoft iPhone Data Recovery to get back deleted videos from iOS device including iPhone, iPad and iPod Touch.

Any app suggestions or topic recommendations are appreciated in the comments down below.

Sunday, August 12, 2018

Fix iPhone Plays Music by Itself


But for most times, the 'iPhone playing music by itself' issue does not need this tool to fix. To make sure whether it's a firmware issue that requires a system repair, try the following tricks to check.
Fix Two: Check Music Library (Apple Music)

In certain instances, the bugs have been identified to be linked to the Music Library, hence it might be necessary to begin with the Music Library resetting via the below steps:

1. Start the Music app.

2. Open the Music Library in the app and tap the 'edit' icon in the topmost region of the screen.

3. Uncheck everything on this list.


Exit the list and leave your phone for a while to confirm whether the iPhone starts playing music by itself problem still occurs or not.
Fix Three: Check if You Shook Your iPhone

In most iPhones, whenever the lock screen is on and music is playing, the music widget can be found accessible on the lock screen. In some instances, this widget can be triggered by tapping the shaking the iPhone thus changing or altering the song.

This occurrence can be misinterpreted as the issue that iPhone starts playing music on its own, hence users should confirm whether the change in music or abrupt play is linked to their shaking the phone.
Fix Four: Delete the App (Pandora)

Certain Apps such as Pandora have been identified to be one of the major cause of this issue. To avoid and eliminate the autoplay option that is plaguing your device, it might be critical to delete the Pandora app.

To confirm that the app is the cause of your problem, delete the app at the moment when iPhone music starts playing on its own. Should the music cease upon app deletion, then it can be inferred that the glitch was caused by the app, consider other fixes if otherwise.


Fix Five: Change your App Settings

Moreover, the music app can be initiated by the Suggested App, hence it is crucial for users to switch off the app suggestion setting on their iPhone to eliminate this option as a potential cause of the problem at hand. To do this, follow the steps below:You may also like:

If you ever lost or accidentally deleted data from your iOS device, you can use the professional Gihosoft iPhone Data Recovery software to retrieve important data from iPhone, iPad or iPod Touch even without backup.

Jihosoft iPhone Backup Extractor Extract and recover all types of data from iPhone backup files, such as camera roll photos, videos, SMS, contacts, reminders, WhatsApp, and etc.

1. Open Settings from the home screen.

2. Under Settings, tap General settings.

3. Turn off the 'Handoff' switch or the 'installed app' switch.


Fix Six: Kill Off the Music App

Moreover, in the case of the 'iPhone/iPad plays music by itself' problem, it is possible that the Music application might need to reconfigure or be Force Closed. Force Closing can be done via double tapping the home button to reveal the background applications.

Identify the Music application and swipe it up to force close it.


Fix Seven: Restart your iPhone

If this problem still persists after executing all the above fixes, it would be crucial to restart your iPhone to resolve any system related glitch.

This can be achieved by long pressing the power button till a slide option pops up. Slide the device to power it down. After the phone has been completely powered down, long press the power button till the apple logo shows to restart it.

You may also like:
free photo recovery software

Gihosoft TubeGet Review: Best YoutTube Downloader to Save YouTube Videos in your Phone 2019 Guide
No doubt, YouTube is the biggest site that shares videos. What if you want to watch any of those videos without internet? Gihosoft TubeGet is a free App devoted to downloading and saving YouTube videos in original format. It also has an option to extract audio stream and save it as an MP3 file. This type of App can be very useful if you want to easily download tutorials, help guides or any sort of videos for your offline collection. Gihosoft TubeGet doesn’t just support YouTube but it is compatible with other websites too such as Vimeo, Facebook, Daily Motion, Instagram, and Netflix. Download this amazing software from here.

Sunday, July 8, 2018

34,000 people now jailbroken with Electra1131, and counting

It hasn’t even been 24 hours since the Electra Team released their updated jailbreak tool for iOS 11.2-11.3.1, and more than 34,000 people have already pwned their devices with Electra1131 as of this writing.


These statistics appear in a live counter that is displayed at the very bottom of the official Electra website.


To make this possible, Electra would need to report every successful jailbreak to the Electra Team’s web server. Notably, the counter doesn’t refresh in real time, so you’ll need to manually refresh the web page every so often to see the number climb.


In a Tweet shared by CoolStar Friday night, we learn that iOS 11.3.1 is the most popular firmware version jailbroken with Electra1131 by far. Approximately 65% of Electra1131 users are running iOS 11.3.1 on their jailbroken device, while the other 35% of users appear to be using iOS 11.2-11.3.


Worthy of note, Electra1131’s success rate is leaving a lot to be desired among jailbreak community members. Many have attempted to enable their jailbreak ten or more times and are still trying; it’s unknown how this success rate impacts the jailbreak counter on the Electra Team’s website.


Those who haven’t yet jailbroken with Electra1131 yet can follow our comprehensive tutorial to do so. It takes you step-by-step through the process of jailbreaking so that you don’t have to do it alone.


Are you running the Electra1131 jailbreak on your device yet? Share in the comments section below.


Sponsor Ads:


Gihosoft Free iPhone Data Recovery is a professional iPhone Data Recovery software to get back all your lost text message, photo, video, call history, note, contact and more from iPhone/iPad/iPod Touch.


Gihosoft Android data recovery Free is a super awesome software specialized in Android file recovery. With this program, you are able to recover deleted photos, music, videos, messages, contacts, call logs, WhatsApp messages, Viber chat history and more from Samsung, Huawei, LG, HTC, Motorola, Google, Oneplus, Sony, Lenovo, ZTE and other Android devices directly. Meanwhile, this Android data recovery software is available for both Windows and Mac platforms.

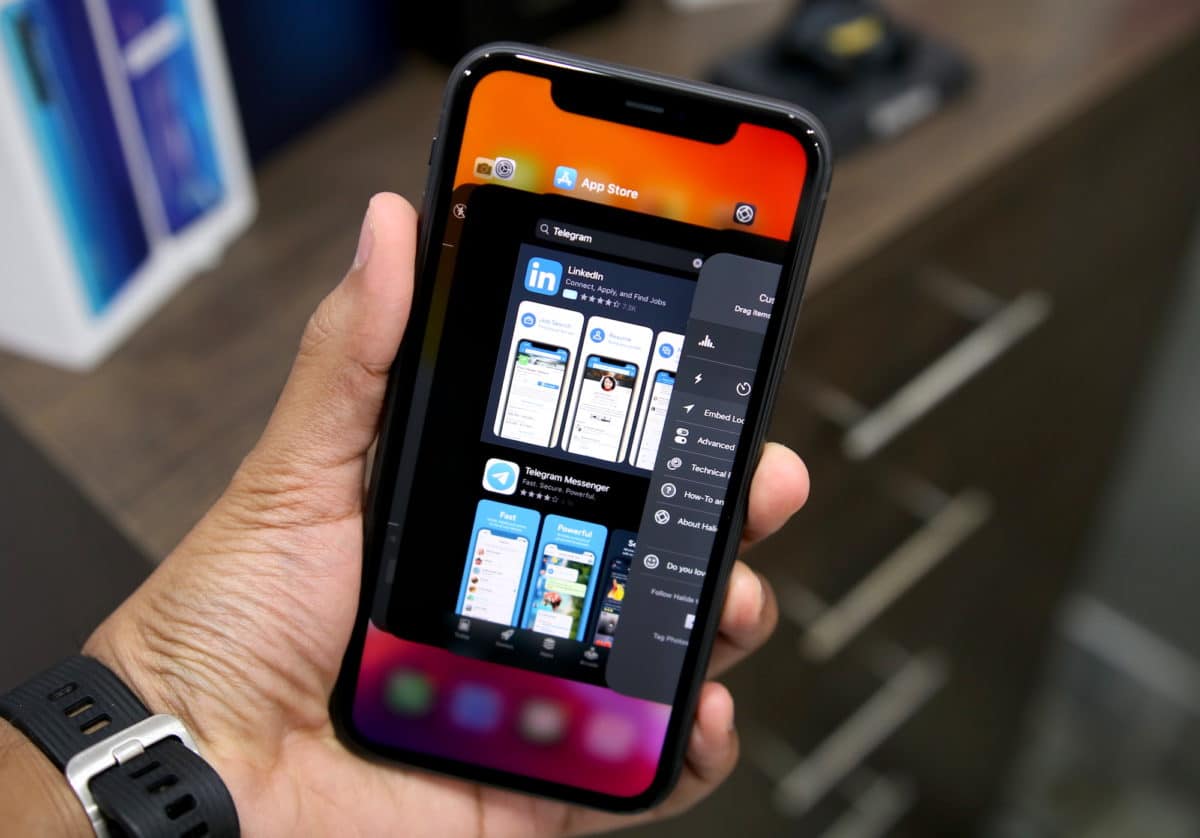
How to Close Apps on iPhone 11, iPhone 11 Pro, and iPhone 11 Pro Max

If you are upgrading to the iPhone 11 or iPhone 11 Pro from an iPhone 8 , iPhone 7, or lower, you are going to take a bit of time to get us...