Wednesday, April 24, 2019

Unc0ver Jailbreak 3.0.1 for iOS 12 – iOS 12.1.2 Released with Important Stability Fix


Following the release of the first stable version of Unc0ver 3.0.0 for iOS 12 – iOS 12.1.2, the @pwn20wnd team has released Unc0ver 3.0.1 with an important stability fix along with other minor improvements.

Among other things, the latest release of the Unc0ver jailbreak tool also adds support for the restart button on iOS 12.1.3 – iOS 12.2. Below is the full change-log of the update:

– Iterate the proc list with proper data locks in Unrestrict to fix a possible race condition in the kernel (Important stability fix)

– Fix a typo in the app

– Fix a bug in logging

– Add iOS 12.1.3 – 12.2 support for the restart button

If you are already running the last stable release of Unc0ver 3.0.0 on your iPhone or iPad, you should upgrade to the latest release for the stability improvements that it offers. Sadly, this release still lacks support for A12-A12X Bionic devices like the iPhone XS and iPhone XR.

While the Unc0ver team has finished their part of the work to jailbreak A12-A12X Bionic devices, they are still waiting for Cydia Substrate to be compatible with the devices. Given Saurik’s recent outburst on the jailbreaking community, I am doubtful that we are going to see Cydia Substrate gain A12-A12X Bionic support anytime soon.

Download: Unc0ver 3.0.1

Also Read:Top 5 Best Torrent Websites for You to Download Malayalam Movies for Free 2019

Also Read:4 Ways to Download Photos from iCloud to iPhone or iPad (iOS 12)

Also Read:How to Fix 0xc00007b “The Application was Unable to Start Correctly” Error

Also Read:Best Methods to Use Windows 10 Emoji for MS Office, Chrome or Messenger

Also Read:5 Best Android Apps for Wedding Cards Designing

Also Read:How to Delete or Hide Purchased Music on iPhone, iPad and iPod Touch

Also Read:Top 5 Best Free File Recovery Software 2019 for Windows and Mac

How to See Song Lyrics in Apple Music


If you subscribe to Apple Music, you can view the lyrics for your favorite songs right from within the Music app on your iPhone or iPad.


First, you'll need to start playing a song in the Apple Music catalog or in your library. Once a song is playing, tap on the song's banner just above the Apple Music menu bar at the bottom to bring up the full song interface.


From here, there are two methods you can use to view lyrics. Let's go through them individually.


Method 1


Tap the ellipsis (three dots) button in the bottom right corner of the screen to bring up the action menu pane.


Tap the Lyrics option just above the Love and Dislike buttons. Songs with available lyrics will have this option displayed, while songs without lyrics available will not.


The lyrics will pop up over the track screen. Scroll down to view the rest of the lyrics.


Method 2


Scroll down while in the full song interface.


You should see Lyrics listed directly above the Up Next feature for songs that have lyrics available. Tap Show alongside it to reveal the song's lyrics.

Note: If you're in the album view you can long press on a listed track to bring up the action menu pane, where the Lyrics option is also available.Sponsor ads:

Gihosoft RePicvid Free Photo Recovery Software provides a free photo recovery software for windows to help users recover the deleted or lost photo for free.

If you lost data after you updated to a new iPhone, you can always use Gihosoft iPhone Data Recovery to get the data back from the old iPhone or backup.You may also like: iphonerecovery.com

If you use android phones, please choose Gihosoft Android Data Recovery.With Gihosoft Android Data Recovery, no longer afraid of data loss!

Apple Pay Now Available in Austria


Last month, it was reported that Apple was looking to expand Apple Pay to more European countries including Austria, with the Erste Bank in Austria teasing the impending launch of the service. Today, Apple Pay support has gone live in Austria.

At launch, Apple Pay in Austria supports credit, debit, and prepaid Mastercard, Visa, and Maestro cards from the Erste Bank in Austria and N26. Other banks like Boon, Bank Austria, Edenred, Revolut, and Vim Pay will also soon jump on the Apple Pay bandwagon.

Retailers which support Apple Pay include Billa, Burger King, Decathlon, H&M, Metro, Penny Markt, Starbucks, Comma, BP, and more. Other retailers like Booking.com, Etsy, Adidas, Asos, RyanAir, and WorldRemit also support Apple Pay in their apps to offer a seamless checkout and payment experience.

You can find the complete list of retailers supporting Apple Pay in Austria over here.

Apart from iPhones, owners of iPad and Macs with Touch ID can also take advantage of Apple Pay for transactions done on the web or inside apps.

With Apple Pay now available in Austria, we should see the Cupertino company’s mobile payment service expand to Greece, Portugal, Estonia, Slovakia, and Slovenia within the next few weeks to a couple of months.
We Want to Hear From You

How has your experience been with Apple Pay? How do you think Apple can further improve it? Do you think more retailers need to support Apple Pay? Drop a comment and share your thoughts with us!

Sponsor ads:

Gihosoft RePicvid Free Photo Recovery Software provides a free photo recovery software for windows to help users recover the deleted or lost photo for free.

If you lost data after you updated to a new iPhone, you can always use Gihosoft iPhone Data Recovery to get the data back from the old iPhone or backup.You may also like: iphonerecovery.com

If you use android phones, please choose Gihosoft Android Data Recovery.With Gihosoft Android Data Recovery, no longer afraid of data loss!

Monday, March 4, 2019

How to Recover Formatted Hard Drive Easily 2019

How to Recover Formatted Hard Drive Easily 2019
Part 1. Factors that Cause Formatted Hard Drive

Nowadays, most of us rely on various gadgets and do not know what to do if some faults happen. The only thing we all know is that all our information is collected and stored on the hard drives. Some people understand the significance of data and make backup copies, while the others even do not know about them at all. That is why due to some accidents, the data may disappear and you will be quite upset. However, remember that there is always the way out. It does not matter what is the reason for data loss, you can easily recover formatted hard drive by applying special recovery software.

Basically, the reasons for data loss may be quite a lot:

Connected with Detecting

One of the main reasons is connected with detecting. That is to say that sometimes hard disk is not seen by the system. That is why the system may stop working in the middle of the process, making for you an obstacle to access to your data.

Crashing of the Dard Disk

Another reason may be related with a crashing of the hard disk. In this case, you may hear the weird noise inside the disk. Some people believe that data may be lost when there is an inappropriate power supply.

A Sudden Shutdown

Additionally, a sudden shutdown of your device may also be a cause of data loss. Analyzing the mentioned above information, one may admit that all of the problems sometimes happen because of our inattentive behavior. We usually forget to switch off the device rightly or reboot it.
Part 2. Precautionary Measures to be Taken Before Recovery

When you lost data do not panic and try to find solutions to solve this issue. It is also important to take some important measures before recovery. It would help you recover your data in a higher rate.

A You should stop working on the computer when your hard drive formatted. It will be better to close all the programs.

B You should try to analyze what may be the reason for such a fault.

C Do not make a panic since you may recover files from the formatted hard drive with the blasting speed. All the data is still located on the hard drive, so the only thing that you have to do is to get the formatted disk recovery program to retrieve data from the formatted hard drive.
Part 3. Recover Data from Dead Hard Drive by Recovery Tool

Today, there are a lot of different programs for recovering of the formatted hard drive. You may search the internet and find out the most appropriate one. Let us analyze recovery software on the example of jihosoft Free iPhone Data Recovery. This is effective recovery software which can assist you to recover data from the formatted hard drive. This software does it easily and quite quickly. Moreover, it is copulative with all the versions of Windows. Together with the user-friendly interface, the software does not require a specialist to install it. You can do it yourself without any help.

Sponsor ads:

Gihosoft Free iPhone Data Recovery:https://www.gihosoft.com/iphone-data-recovery-free.html

Gihosoft iPhone Data Recovery Free

Free iPhone Data Recovery Software for Windows/Mac

Recover up to 12+ types of files, including contacts, SMS, photos, WhatsApp, Viber, notes, etc.

Restore lost data from iOS devices directly or from iTunes and iCloud backup

Recover iPhone data lost due to iOS upgrade/jailbreak, accidental deletion, device lost or broken

Support all the latest iPhone, iPad and iPod Touch

Both Free and Pro version.

If you lost data after you updated to a new iPhone, you can always use Gihosoft iPhone Data Recovery to get the data back from the old iPhone or backup.You may also like: iphonerecovery.com

If you use android phones, please choose Gihosoft Android Data Recovery.

With Gihosoft Android Data Recovery, no longer afraid of data loss!

Must read:Youtube video downloader for pc

Gihosoft RePicvid Free Photo Recovery Software provides a free photo recovery software for windows to help users recover the deleted or lost photo for free.

Jihosoft Android Data Recovery: the best Android Data Recovery software for Windows and Mac to recover deleted contacts, messages, photos, videos, WhatsApp and etc from Android devices.Tips:How to transfer messages from iPhone to iPhone


jihosoft Free iPhone Data Recovery

Tuesday, February 26, 2019

Download Videos on iPhone 8/X ?


1 Download Videos on Your iPhone 8/X with iTunes

Step 1: Launch the iTunes application on your computer and then connect your iPhone via a USB cable.

Step 2: On the iTunes menu on top click on the “File > Add File to Library” and navigate to the folder where your desired videos are located.


Step 3: Select the videos and then add them to the displayed library.

Step 4: After you have added the videos to the iTunes library click on your iPhone icon in iTunes and then from the left sidebar menu click on “Movies.”

Step 5: Check “Sync Movies” and then select and check all the videos that you want to put on your iPhone.


Step 6: Click on “Apply” after which iTunes will sync the videos to your iPhone 8/X.
3 Download Videos to Your iPhone 8/X via iCloud Drive

Step 1: From your computer using a web browser go to iCloud.com and log in with your Apple ID.

Step 2: Once you have logged in to your account go to “iCloud Drive”.

Step 3: Navigate to the folder where your desired videos are located on your computer, then drag and drop the selected videos to iCloud Drive.

Step 4: After adding the videos to iCloud Drive then on your iPhone 8/X go to “Settings > [Your name] > iCloud > iCloud Drive” and toggle it on.


Step 5: Locate the “Files” app from your iDevice’s homepage, and tap to open it.

Step 6: You will see all the videos you uploaded there available for download to your iPhone 8/X.


Verdict

iTunes is usually prone to an array of errors which are not easy to fix, and it deletes all the existing videos every time you sync your iPhone with iTunes requiring one to back up files continuously. iCloud Drive is simple to use, but it also has several limitations as it requires one to have a very stable network connection contrary to which it becomes impossible to get videos to your iPhone 8/X.

Among the three ways, the iMyFone TunesMate is the best method to get your videos to your iPhone 8/X. It is simple and straightforward and can even be easily followed by a newbie. TunesMate have no form of restriction and can add and manage files in any format across an infinite number of iDevices and iTunes libraries expounding on your ways to enrich your videos collection. It can add data without erasing the old video files on your iPhone, unlike iTunes. It is usually very flexible as it supports transfer of almost all media file types and formats and can even convert your videos to formats compatible with your iPhone.


Bonus Tip: Top 5 Free Websites to Download Videos

To collect some free videos for your iPhone 8/X then it is best you to know several free genuine videos downloading sites, which provide abundant of videos and which can allow you to download videos to your local hard drive for offline viewing. Here is a list of the best-known sites that provide free videos, just go search your loved video and download to your new iPhone 8/X !

1. YouTube.com

YouTube is the world’s most popular free video sites and the most famous online video site in the world. You can find anything you want here.

2. Dailymotion.com

Dailymotion has well organized and interesting categories, it can also adjust the recommended video based on the user's seeing habit.

3. Break.com

Break is an entertainment and humor website, offering a great number of funny videos, which is fit for passtime.

4. Metacafe.com

Metacafe specializes in short-form video entertainment with lots of categories, we have to admit that Metacafe has a super fast loading time.

5. Vimeo.com

Vimeo focuses on HD videos which gives you a perfect visual experience, and are well optimized for mobile devices such as iPhone.


Sponsor ads:

Gihosoft Free iPhone Data Recovery:https://www.gihosoft.com/iphone-data-recovery-free.html

Gihosoft iPhone Data Recovery Free

Free iPhone Data Recovery Software for Windows/Mac

Recover up to 12+ types of files, including contacts, SMS, photos, WhatsApp, Viber, notes, etc.

Restore lost data from iOS devices directly or from iTunes and iCloud backup

Recover iPhone data lost due to iOS upgrade/jailbreak, accidental deletion, device lost or broken

Support all the latest iPhone, iPad and iPod Touch

Both Free and Pro version.

If you lost data after you updated to a new iPhone, you can always use Gihosoft iPhone Data Recovery to get the data back from the old iPhone or backup.You may also like: iphonerecovery.com

If you use android phones, please choose Gihosoft Android Data Recovery.

With Gihosoft Android Data Recovery, no longer afraid of data loss!

Must read:Youtube video downloader for pc

Gihosoft RePicvid Free Photo Recovery Software provides a free photo recovery software for windows to help users recover the deleted or lost photo for free.

Jihosoft Android Data Recovery: the best Android Data Recovery software for Windows and Mac to recover deleted contacts, messages, photos, videos, WhatsApp and etc from Android devices.Tips:How to transfer messages from iPhone to iPhone


jihosoft Free iPhone Data Recovery

Friday, February 22, 2019

5 Ways to Fix iPhone Stuck on Verifying Update When Updating to iOS 12 2019


5 Ways to Fix iPhone Stuck on Verifying Update When Updating to iOS 12 2019
"Hello, I need help. Actually, I started installing the iOS 12 in the morning and my iPhone stuck on verifying update screen for 5 hours. What kind of problem is this? Will the new update installation taking some time or not? I want some solution for this. Please help!"


Many people prefer performing update process wirelessly i.e. without iTunes and they are likely to get verifying update screen for long time. However, the issue restricts smooth updating and is annoying but it can be repaired by some fixes. Here is what you can try when your iPhone stuck on Verifying Update screen.
5 Ways to Fix iPhone Stuck on Verifying Update When Updating to iOS 12


1. Hard Reset Your iPhone


2. Press Sleep/Wake Button


3. Restore iPhone with an Old Backup


4. Fix the Problem without Data Loss


5. Hardware Issue
1. Hard Reset Your iPhone

Well, your iPhone is stuck on Verifying Update and you can't even do anything as everything is stucked, try to perform a hard reset then as that may help restore the proper functioning of your device.

If you have:


iPhone 7 or iPhone 7 Plus, you are required to press and hold the volume down and power button simultaneously.


iPhone 6 or earlier, hold down Home button and power button simultaneously.

Hold the buttons for around 10 seconds until the Apple logo come up on the screen. Let go the buttons and check if your issue resolves. Most probably, it should get resolved as rebooting an iPhone can resolve up to 70% of the issues.


2. Press Sleep/Wake Button

If the hard reset doesn't make any change and you face that iPhone stuck on Verifying Update issue again, try this Sleep/Wake button trick. What you are required to do is just simply hit the Sleep/Wake button of your device for a few number times.

Note: Make sure, between each press you wait for a couple of seconds.

Getting a bit in detail, pressing the Sleep/Wake button again and again forces your iOS device to lock the screen then wake it up, then again lock it up and wake it up again. Repeating this over and over again for about 5-10 times in a row most probably resolves the issue of stucked verifying update.

If the trick works, you'll see an Apple logo and progress bar on the screen. Now let the device do its work to install the software update. Be patient, it may take some time install the update.
3. Restore iPhone with an Old Backup

If the above solutions didn't prove helpful then try restoring your iOS device with an older backup via iTunes. It is another quick fix you can try to get your issue resolved. Any faulty changes made to the device's settings that are causing the issue will be rolled back and your device should behave as normal.


Launch iTunes application on your Mac or Windows computer.


With the help of a lightning cord, connect your iOS device to the computer. If you are asked to enter your device's password or Trust the computer, allow it and follow the further steps.


As soon as your device gets connected, it will appear on iTunes. Tap on it when you see it.


Push "Restore Backup" button and select the most relevant one by monitoring the date and size of the earlier backups.


Lastly hit Restore and let the process complete.


4. Fix the Problem without Data Loss (iOS 12 Supported)

Does your iPhone still stuck on Verifying Update screen? If all the above solutions went in vain, don't worry; we have a one-stop solution that will positively help you. You will be out of the trouble when you use iMyFone iOS System Recovery. It's a third-party tool that provides efficient solution for iOS issue. This is why it has gained a great level of popularity.Sponsor ads:

Gihosoft Free iPhone Data Recovery:iphonerecovery.com

Free iPhone Data Recovery Software for Windows/Mac

Recover up to 12+ types of files, including contacts, SMS, photos, WhatsApp, Viber, notes, etc.

Restore lost data from iOS devices directly or from iTunes and iCloud backup

Recover iPhone data lost due to iOS upgrade/jailbreak, accidental deletion, device lost or broken

Support all the latest iPhone, iPad and iPod Touch

Both Free and Pro version.

If you lost data after you updated to a new iPhone, you can always use Gihosoft iPhone Data Recovery to get the data back from the old iPhone or backup.

Top 10 Best FRP Bypass Tools to Bypass Google Account on Android Device 2019

Worth reading:download youtube 1080p

If you use android phones, please choose Gihosoft Android Data Recovery

Jihosoft Android Data Recovery: the best Android Data Recovery software for Windows and Mac to recover deleted contacts, messages, photos, videos, WhatsApp and etc from Android

Wednesday, February 20, 2019

How to Perform iOS 12 Downgrade 2019?


Part 1: How to Downgrade iOS 12 to iOS 11.3
1 Why Should We Downgrade from iOS 12 to 11.3?

ioS 11.3 is enjoyed by millions of people. Apart from bug fixes ,iOS 11.3 contains a number of features like New camera setting, a new effect for messages called celebrate for use in imessage , a new health app setting that allows to notify any emergency contact automatically when emergency SoS is used. The update offers many new and exciting features which are should definitely be given a shot!
2 Steps to Downgrade from iOS 12 to 11.3

Step 1: Connect your device to your computer and then launch iTunes.

If it compels you to download a newer firmware, tap "cancel".

Step 2: Tap "Restore iPhone" on the summary page.

Step 3: Pressing the Option key (Mac) or shift key (Windows), and click Restore. Then go to the location where you have saved the iOS 11.3 IPSW file.

Step 4: Click "Restore" and process will be finished.


Part 2: How to Downgrade from iOS 11.3 to 11.2.1
1Why Should We Downgrade from iOS 11.3 to 11.2.1?

iOS 11.2.1 offers crucial changes like security content page for 13 significant vulnerabilities of iOS 11.2. It can cause a huge impact on the performance of your device as well. It has APNs server,such as an attacker in a privileged network position can track a user’s activity.
2Steps to Downgrade from iOS 11.3 to 11.2.1

Step 1: Download iOS 11.2.1 IPSW file.

Step 2: Put the device in DFU mode and connect it to iTunes.

Control the "Power" and "Home" at the same time. After Apple logo shows, release "Power" and hold "Home" till you see "Connect to iTunes".

Step 3: Tap "OK". Hold the key “Option” for Mac or “Shift” on Windows and then choose “Restore iPhone”.

Step 4: Choose iOS 11.2.1 IPSW file.

Step 5: Click “Restore and Update”.


Part 3:How to Downgrade from iOS 11.3 Beta to iOS 11.2.1
1Why Should We Downgrade from iOS 11.3 Beta to 11.2.1?

iOS 11.2.1 has some really amazing tricks. Such as freeing some of the memory in your iPhone or clear the caches. It also has a Jail breaking update which is also advantageous in many aspects.
2Steps to Downgrade from iOS 11.3 Beta to 11.2.1

Step 1: Plug your device into your computer.

Step 2: Turn off your device.

Step 3: Hold the Power button for 3 seconds.

Step 4: Holding the Home button without releasing the Power button for 10 seconds.

Step 5: Release the power button and hold the home button until you get notified from iTunes that it has detected your device is in Recovery mode.

Step 6: Click “OK”. Choose the iOS 11.2.1 IPSW file that you downloaded earlier.

Step 7: Tap "Restore and Update".


Part 4:Things you Should Know Before Downgrade

(1). Backup Using iCloud

In order to secure your information. You should backup your iPod,iPad and iPhone if ever it gets lost, replaced or damaged in any case. iCloud is an amazing way of backing up your device and keeping the data safe and secure.Sponsor ads:Schedule Text Messages on iPhoneMust Read:If you lost data after you updated to a new iPhone, you can always use Gihosoft iPhone Data Recovery to get the data back from the old iPhone or backup.

Gihosoft Free iPhone Data Recovery:iphonerecovery.com

If you use android phones, please choose Gihosoft Android Data Recovery

1. Connect your device to a WI-FI network.

2. Go to setting, your name and tap iCloud.

3. Tap iCloud backup.

4. Make sure the backup finished.

(2). Free Up Enough Space Sponsor ads:

Jihosoft iPhone Data Recovery:https://www.jihosoft.com/recovery/ios-data-recovery.html

Jihosoft iPhone Data Recovery

Free iPhone Data Recovery Software for Windows/Mac

Recover up to 12+ types of files, including contacts, SMS, photos, WhatsApp, Viber, notes, etc.

Restore lost data from iOS devices directly or from iTunes and iCloud backup

Recover iPhone data lost due to iOS upgrade/jailbreak, accidental deletion, device lost or broken

Support all the latest iPhone, iPad and iPod Touch.

Tips:

How to transfer messages from iPhone to iPhone

Gihosoft Free iPhone Data Recovery:https://www.gihosoft.com/iphone-data-recovery-free.html

Gihosoft iPhone Data Recovery Free

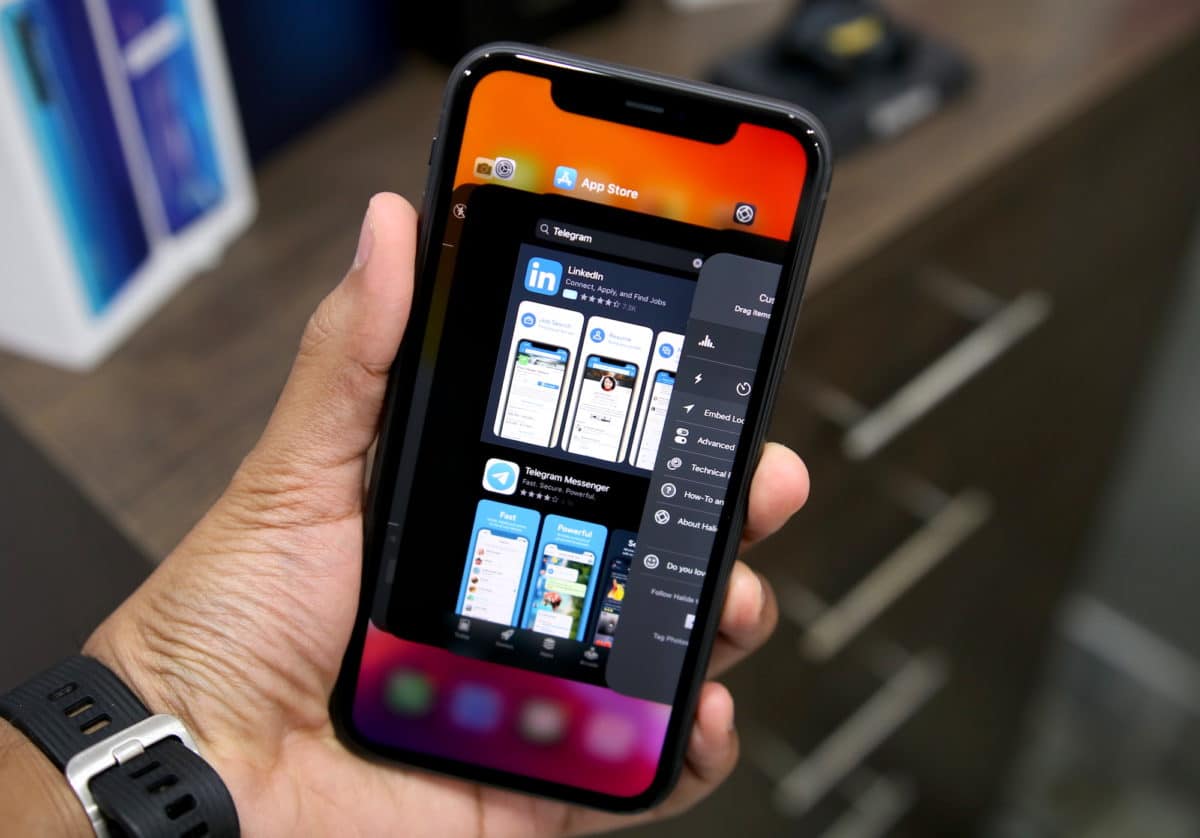
How to Close Apps on iPhone 11, iPhone 11 Pro, and iPhone 11 Pro Max

If you are upgrading to the iPhone 11 or iPhone 11 Pro from an iPhone 8 , iPhone 7, or lower, you are going to take a bit of time to get us...